Double Buffering and Active Rendering in Java with Swing Integration
Also, please check out the passive rendering guide, Double Buffering and Passive Rendering in Java using a Timer object, or if needed, go back to the main double buffering and rendering tutorial page.
Double Buffering and Active Rendering in Java with Swing Integration
,
Article and code written by James Murphy.
Active rendering is when you render the graphics over and over again in a tightly controlled loop, where the developer has complete control over every repaint's schedule. Active rendering versus passive rendering has the advantage of being able to squeeze out more frames per second, which can help with smoother animations and sprite movements. This tutorial uses active rendering techniques by creating a BufferStrategy on the application's JFrame, and also attempts to integrate Swing components with the BufferStrategy. Integrating Swing components when using an active rendering approach is tricky, because if the codebase is to follow the thread confinement rules of Swing, then the drawing of any Swing components has to occur on the EDT and find their way to the BufferStrategy graphics on the active rendering thread. The approach I took in this tutorial to render Swing to our BufferStrategy's Graphics object is to schedule an event on the EDT to render Swing to that Graphics object and wait for the event to finish (a SwingUtilities.invokeAndWait call). I decided on this approach because it turns out the wait for the EDT to finish that call is rather quick enough to produce a lot of frames, and uses the least amount of code.
Another approach I have attempted is to draw Swing components to a transparent image on the EDT every so often, and then drawing that image on top of the graphics from the BufferStrategy. There are two weaknesses in this approach. The first is that you only obtain the latest Graphics when the schedule finishes versus on every render or on a natural repaint. The second weakness is that it creates a single large transparent image that may take a while to render on top of the Graphics object from the BufferStrategy, especially if the user was to display the application across an entire monitor or two. This weakness can be improved by creating a series of smaller images stored with a coordinates on where to draw the image for each different opaque component, although there would still be the weakness of having to draw large opaque containers if the application had those.
One other approach I tried was to use a JLayeredPane with two layers, a top layer consisting of transparent JPanel with the GUI controls, and a bottom layer of a Canvas with a BufferStrategy. I found this to not work, because when using a BufferStrategy with a Canvas, the Canvas's graphics would not draw under the transparent JPanel (changing AlphaComposites did not help), only the graphics of whatever was under the JPanel besides the Canvas would show (this was the JFrame's background). Not creating a BufferStrategy on the Canvas would allow the Canvas object to actually draw under the transparent JPanel. This method could still be used where you could add small individual Swing components to the layered pane, but you would still have the background of those components showing, such as a default gray background behind a JLabel, or outside the rounded corners of a JButton. If anyone knows a way to make this layered pane approach possible or has an explanation on this behavior, feel free to email me, thank you!
In this tutorial I will cover some main issues I and others find for creating a small hobby game or application. These main issues and topics are the following:
- Properly set the width and height of a JFrame
- Double buffering and active rendering via BufferStrategy object from a JFrame
- Using a high resolution timer to time our animations, movements, and events
- Basic Rendering and having those graphics stretch as you resize the frame
- Integrate Swing components and actively render them on top of your application's graphics
- Stopping the application from over using the processor
- Creating the game or update loop
- Why I didn't use Canvas, and why you might want to
- Room for improvements
- Summary, advantages and disadvantages
- The main code example
Be sure to check the bottom of this page where you can view and download my entire Java program using all of the techniques I will mention. The entire code base is in one class with a lot of static classes, this was my idea of simplifying the distribution of the code and the viewing of the source online for quick reference.
 |
Properly set the width and height of a JFrame
When you create a JFrame with a set width and height, some of that width and height goes to the title bar and the borders of the application window. In a full screen program, this does not apply as there are no decorative surroundings. To fix the window to have a drawing space within the application window that matches what you originally set the JFrame to you need to retrieve the Inset object of the JFrame and resize it according to how much space in pixels the insets take up. This is especially handy if you do not allow the resizing of your application and need a specific resolution.
frame.setVisible(true);

...

// Change width and height of window so that the available
// screen space actually corresponds to what is passed, another
// method is the Canvas object + pack()
frame.setSize(width, height);
Insets insets = frame.getInsets();
int insetWide = insets.left + insets.right;
int insetTall = insets.top + insets.bottom;
frame.setSize(frame.getWidth() + insetWide,
        frame.getHeight() + insetTall);
Another method to accomplish this is to create a Canvas object (which if you used it, you would use a BufferStrategy on that instead of the JFrame itself) with a size that matches the drawing area you want, and then add the Canvas object to the JFrame with a call to the JFrame’s pack() method.
Canvas canvas = new Canvas();
Canvas.setSize(400, 300);
frame.add(canvas);
frame.pack();
Double buffering and active rendering via BufferStrategy object on a JFrame
The main object to accomplish double buffering with active rendering is the BufferStrategy object. This small section from the main code example shows how to retrieve the BufferStrategy inside a JFrame.
// create a buffer strategy using two buffers
createBufferStrategy(2);
// set this JFrame's BufferStrategy to our instance variable
BufferStrategy bufferStrategy = getBufferStrategy();
You can only create a BufferStrategy from Window or Canvas objects, or any of their subclasses.
Another word you may hear people use in discussing with BufferStrategies is page flipping. Page flipping is a double buffering technique that uses two buffers, a display buffer, and a back end buffer that's being drawn too. These two buffers work together by simply switching pointers to switch roles between frame renders. Page flipping is usually more efficient than the historic notion of double buffering in Java (in Java, that was the act of drawing a set of graphics to an image in the background, and then drawing the image at once onto the screen with drawImage), and luckily the BufferStrategy class decides for us what technique we should use, by first trying to use page flipping, and if that doesn't work out, then it tries double buffering. To the Java developer using a BufferStrategy (you can find query to find out what strategy is being used) and user, the technique used is abstracted. People from what I've seen use the word double buffering to refer to any type of double buffer rendering technique. Also, page flipping is only available in full-screen mode. You can read more on page flipping in the Java tutorial.
Inside the active rendering loop, code that roughly follows below should exist:
try {
    Graphics2D g = (Graphics2D) bufferStrategy
            .getDrawGraphics();
    drawGame(g);
    g.dispose();
    if (!bufferStrategy.contentsLost()) {
        bufferStrategy.show();
    }
    }
    // This catch is to allow the application to not stop
// working when the application encounters the possible bug:
// http://bugs.sun.com/bugdatabase/view_bug.do?bug_id=6933331
// One work around to not encounter this is to Disable d3d
// using -Dsun.java2d.d3d=false
// Not sure why the bug is said to "... has no consequences
// other than a stack trace dump in a console (no hang ...",
// as people are generally not going to catch an
// IllegalStateException...
// You can try to see if you can get the exception to print
// by resizing the window rapidly on the primary or secondary,
// or dragging the window off and on the primary monitor.
// This of course assumes you are using d3d
catch (IllegalStateException e) {
    e.printStackTrace();
    }
Check the BufferStrategy API on another setup for rendering graphics with a BufferStrategy. My approach here slightly differs because I am not worried on repeating the rendering at all if something goes wrong, as I'll skip that frame and render another soon enough. In the code above, usually the catch for the IllegalStateException would not be there, however, with the bug 6933331 still existing, having a catch definitely helps.
Using a high resolution timer to time our animations, movements, and events
To time our animations and movements perfectly, we must find out how much time has elapsed. Before Java 1.5, the easiest way to do this was to use System.currentTimeMillis() which returns a time in milliseconds, however on some older operating systems, that timer has a poor resolution, which is the amount of time that must separate two timer calls. Windows XP/Vista/7 has a default resolution of 16ms, and I've read that Windows 98 even has a resolution of 55ms (not sure if that is correct). This can create some not so fluid animations. Usually we would want games to hit 60 noticeable frames per second, as that's a common max refresh rate of monitors, and anything higher is usually said to be unnoticeable (for most people including myself at least), so having a low timer resolution will help us create more frames that are noticeably different. An alternative to System.currentTimeMillis(), is System.nanoTime(), a high resolution timer since Java 1.5 that returns a time in nanoseconds (note that the precision is in nanoseconds, not accuracy). With a better resolution, it is best to use nanoTime() to measure time. A good read on the two timing calls is Inside the Hotspot VM: Clocks, Timers and Scheduling Events - Part I - Windows by David Holmes.
private synchronized void updateData() {
    // Calculating a new fps/ups value every second
    if (nanoseconds >= 1000000000) {
        fps = frames;
        ups = updates;
        nanoseconds = nanoseconds - 1000000000;
        frames = 0;
        updates = 0;
    }

    long elapsedTime = System.nanoTime() - oldTime;
    oldTime = oldTime + elapsedTime;
    nanoseconds = nanoseconds + elapsedTime;

    ... more update code using elapsedTime
    ... ex: sprite.move(elapsedTime), event.update(elapsedTime)
    }
I find that setting the speed of animations and sprites in pixels per nanoseconds is difficult to think about, simply because of how many zeroes there are. One trick is to set the speed in pixels per millisecond, and then in the constructor of an animation or whatever you use, convert the speed to nanoseconds by dividing by 1,000,000.
public MovingCircle(Rectangle boundedArea, float x, float y, int width,
                    int height, boolean down, boolean right,
                    float speed) {
    this.boundedArea = boundedArea;
    this.x = x;
    this.y = y;
    this.width = width;
    this.height = height;
    this.down = down;
    this.right = right;
    // Convert pixels per millisecond to nano second
    // Easier to originally think about speeds in milliseconds
    this.speed = speed / 1000000;
    this.color = Color.DARK_GRAY;
    }
Another approach to updating animations is updating them by a tick based approach. An example of this approach is when you move a sprite a fixed amount of distance every time a certain piece of code pertaining to updating a position or animation is executed. Updating by how much time has elapsed is mostly superior to tick based animations, since with tick based animations, the speed of animations and movements of the sprite is never certain on any computer besides your own, as other computers will execute the code at a different speed, making some animations impossible to use, or very annoying to use. While tick based updating can help you do a few things with more ease (like detecting collisions), it is generally worth it to spend the time needed to program in time based updating.
Basic Rendering and having those graphics stretch as you resize the frame
Rendering with a BufferStrategy is pretty straight forward. One thing to look out for is making sure that you render at the correct location. Location 0,0 of a windowed application is the top left corner of the window, where the title bar is, but logically you would want this to be the top left corner of the screen between the window’s borders. To achieve this, you can make all draw calls use the JFrame's inset's values, or use Graphic's translate method. The approach I took in the tutorial is to have my GameUpdater object (which handles the highest level of rendering) observe the JFrame for any changes to its size. When that size changes, my custom JFrame sends the GameUpdater data consisting of the x and y coordinates of where the inner window begins, and the width and height of the rest of the window. This has the advantage of not having to store a reference to the JFrame to get the latest size of the insets, and not having to depend on an old inset values where new inset values may be created when the JFrame changes it's look and feel or whether it's decorated or not (I do not know if old Inset references are updated, or if it's immutable).
static interface ResizeListener {
    public void drawAreaChanged(int x, int y, int width, int height);
}

... GameUpdater implementing the interface

@Override
public void drawAreaChanged(int x, int y, int width, int height) {
    synchronized (drawAreaBounds) {
        drawAreaBounds.setBounds(x, y, width, height);
    }
}

... One of JFrame's methods from implementing ComponentListener:

@Override
public void componentResized(ComponentEvent e) {
    Insets insets = this.getInsets();
    resizeListener.drawAreaChanged(
            insets.left,
            insets.top,
            this.getWidth() - (insets.left + insets.right),
            this.getHeight() - (insets.top + insets.bottom));
}

... An example draw call now using the bounds stored in the Rectangle

tempGraphics.drawImage(drawing, drawAreaBounds.x, drawAreaBounds.y,
        drawAreaBounds.width, drawAreaBounds.height, null);
In the code example we will see shortly, we draw to an image's graphics instead of an actual Graphics object from the BufferStrategy. We do this because we can use the image as our canvas to draw our application's graphics to, and then stretch the image to the entire viewable area of the JFrame in case the user resizes the application. Stretching and resizing the graphics with this method or a similar method should only be used if that is what the application desires. Some applications wish to show more information with more screen space available, and some, like the application in this tutorial, may only want to show the same amount of information no matter the amount of space available. The following shows the creation of a compatible BufferedImage that we will use throughout the program's execution.
// We draw almost all graphics to this image, then stretch it over the
// entire frame.
// This allows a resize to make the game bigger, as opposed to
// just providing a larger area for the sprites to be drawn onto.
drawing = GraphicsEnvironment.getLocalGraphicsEnvironment()
        .getDefaultScreenDevice().getDefaultConfiguration()
        .createCompatibleImage(drawingWidth, drawingHeight);
The "compatible image", means that it's an image that has a layout and color model that can best support the display format that the application is running on. From the image, we can extract the graphics object from it, and then draw all of our graphics to it, starting with the background to erase what was previously there from the last update, and ending with our sprites and other graphical effects.
After all the graphics are painted to the image, we can then draw it to the JFrame in the correct location by using the drawing bounds Rectangle, and have it stretched or squeezed to fill the entire draw area of the JFrame as well.
... g being a Graphics object from the BufferStrategy

// Image call that scales and stretches the game's graphics over
// the entire frame
// NOTE: This method of stretching graphics is not optimal.
// This causes a computation of a stretched image each time. A
// better implementation would be to cache an image of the
// latest representation of a drawn circle,
// and re-cache whenever there is a visible change (like color,
// or it's size, which would be due to a window resize), and
// draw that cached image at the correct calculated location.
// Additionally, it also causes the rendering to this image to
// be done on the CPU. See the improvements section in the
// tutorial.
gameGraphics.drawImage(drawing, drawAreaBounds.x,
        drawAreaBounds.y, drawAreaBounds.width,
        drawAreaBounds.height, null);
The method of stretching graphics used in this tutorial is not that efficient. A better implementation would be to cache an image of the latest representation of a drawn circle, and re-cache whenever there is a visible change (like color, or its size, which would be due to a window resize), and draw that cached image (at that point, a managed image existing in VRAM) at the correct calculated location (this also saves us from having to do the same scaling operation on every render). See the improvements section for more information.
Integrate Swing components and actively render them on top of your application's graphics
There's a lot of talk from what I've seen and researched on the internet about how you should not use Swing in programs that use active rendering, and sometimes, how it's impossible to do so, and that you should create your own user interface components. This is very accurate regarding that it's not the best for performance (there's always a downside such as a context switch), as all interactions with Swing need to be confined to the EDT including rendering, but on the flip side, it may be worth the effort to do so as you would not spend time creating your own user interface components.
The approach I took in this tutorial to render Swing to our BufferStrategy Graphics object is to schedule an event on the EDT to render Swing to that Graphics object and wait for the event to finish (a SwingUtilities.invokeAndWait call). I decided on this approach because it turns out the wait for the EDT to finish that call is rather quick enough to produce a lot of frames, and uses the least amount of code.
// Paint our Swing components, to the graphics object of the
// buffer, not the BufferedImage being used for the
// application's sprites.
// We do this, because Swing components don't resize on frame
// resizes, they just reposition themselves, so we shouldn't
// stretch their graphics at all.
try {
    SwingUtilities.invokeAndWait(new Runnable() {
        @Override
        public void run() {
            if (componentToDraw instanceof JComponent) {
                ((JComponent) componentToDraw).paintComponents
                        (swingAndOtherGuiGraphics);
            } else {
                componentToDraw.paintAll
                        (swingAndOtherGuiGraphics);
            }
        }
    });
} catch (InterruptedException e) {
    Thread.currentThread().interrupt();
} catch (InvocationTargetException e) {
    // should not happen
    e.printStackTrace();
}
For aesthetic purposes, it's best to make sure any containers and other needed components have their backgrounds not opaque. This for example allows only the graphics of a button to be displayed over the graphics of the application versus an additional block of background color surrounding the button which would come from its parent container like a panel.
// Now set the JPanel's opaque, along with other Swing components
// whose backgrounds we don't want shown, so we can see the
// application's graphics underneath those components!
// (Try commenting some out to see what would otherwise happen!)
changeColorPanel.setOpaque(false);
this.setOpaque(false);
title.setOpaque(false);
programTitlePanel.setOpaque(false);
fpsAndUpdatePanel.setOpaque(false);
holder.setOpaque(false);
For the JFrame, we need to ignore repaints (less events to contend with on the EDT for our rendering), and set the content pane to be transparent (so it does not draw over our actively rendered graphics).
JFrame frame = new JFrameWithResizeListener(gameUpdater);
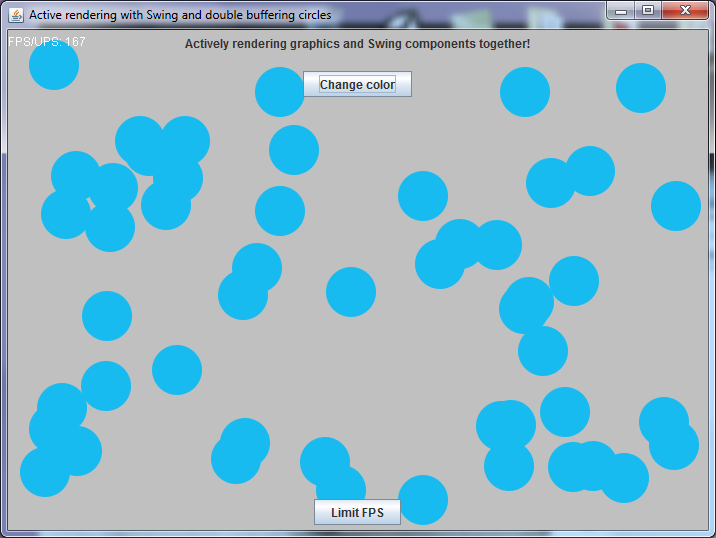
frame.setTitle("Actively rendering and double buffering " +
"graphics and Swing components together");
frame.setDefaultCloseOperation(WindowConstants.EXIT_ON_CLOSE);
frame.setVisible(true);
// Ignore repaints, as we will actively render the frame's graphics
// ourselves
frame.setIgnoreRepaint(true);
// While we have the frame reference available, set it's content
// pane to not be opaque.
// The JFrame's content pane's background would otherwise paint over
// any other graphics we painted ourselves
if (frame.getContentPane() instanceof JComponent) {
// JComponent's have a handy setOpaque method
((JComponent) frame.getContentPane()).setOpaque(false);
} else {
frame.getContentPane().setBackground(new Color(0, 0, 0, 0));
}
One thing to keep in mind when rendering the Swing components is to render the Swing graphics directly to the Graphics object from the BufferStrategy. We do not draw it to any stretchable BufferedImage or any other technique that may be used, because when a container resizes, most Swing components reposition themselves versus only shrinking or expanding. We also want to make sure that on this draw, our graphics perfectly align up with where the expected clickable areas. This is done by translating the graphics coordinate system to align with the inside portion of the JFrame where we draw to (an alternative to using the values from the Frame's insets on every draw call).
final Graphics swingAndOtherGuiGraphics = g.create();
synchronized (drawAreaBounds) {
    // The translate is needed to to align our drawing of
    // components to their "clickable" areas (changes where 0, 0
    // actually is, comment it out and see what happens!)
    swingAndOtherGuiGraphics.translate(drawAreaBounds.x,
            drawAreaBounds.y);
Stopping the application from over using the processor
As you can imagine, rendering the graphics over and over as fast as you can in a loop means that the processor will do that work as fast as it can while using the most processing power it can obtain. This behavior might not be nice for a non-full screen game as a potential user may be multitasking with other programs they wish to use, or because it will needlessly spend a mobile user's battery life, or even be annoying to someone who doesn't like their loud CPU fans blowing away at full speed. A simple fix would be to let the processor rest for 10 milliseconds on every update with a call to Thread.sleep(10), this would cap the FPS (frames per second), of the program to a max of 100 (1000 milliseconds in a second, divided by 10 milliseconds of rest per update = 100 updates max with instant updates). Another method is to choose how much time you wish to spread your updates apart, and sleep for that amount time minus how long your update actually took. The following is one such attempt at providing that functionality:
/**
 * Sleeps the current thread if there's still sometime the application
 * can wait for until the time the next update is needed.
 *
 * @param nanoTimeCurrentUpdateStartedOn Time that current update
 *                                       started
 */
 private void waitUntilNextUpdate(long nanoTimeCurrentUpdateStartedOn) {
    // Only sleep to maintain the update speed if speed is higher than
    // zero, because Thread.sleep(0) is not defined on what that
    // exactly does
    long currentUpdateSpeed = gameData
            .getCurrentWaitTimeBetweenUpdates();
    if (currentUpdateSpeed > 0) {
        // This could be more accurate by sleeping what's needed on
        // average for the past few seconds
        long timeToSleep = currentUpdateSpeed -
                ((System.nanoTime() -
                        nanoTimeCurrentUpdateStartedOn)
                        / 10000000);
        // If the speed of updating was so slow that it's time for
        // the next update, then choose 0
        timeToSleep = Math.max(timeToSleep, 0);
        // Again, avoiding Thread.sleep(0)
        if (timeToSleep > 0) {
            try {
                Thread.sleep(timeToSleep);
            } catch (InterruptedException e) {
                // It's okay if we're interrupted, program will just run
                // faster.
                Thread.currentThread().interrupt();
            }
        }
    }
}
 |
 |
Creating the game or update loop
To recap, active rendering is when you constantly repaint the graphics of a program over and over again in a loop. Here's a game or update loop that would fit such a program.
public void updateLoop() {
    // Wait for a buffer strategy from the queue, can't start the game
    // without being able to draw graphics
    try {
        bufferStrategy = bufferStrategyQueue.poll(1, TimeUnit.SECONDS);
    } catch (InterruptedException e) {
        // Thread should not be interrupted, this method is the lowest
        // method the thread should execute from this point on, as the
        // method has an infinite loop
        e.printStackTrace();
    }
    if (bufferStrategy == null) {
        System.err.println("BufferStrategy could not be made!");
        System.exit(1);
    }

    // For max accuracy, resetting the time since last update so
    // animations and sprite positions remain in their standard first
    // position
    gameData.resetTimeOfLastUpdate();

    // Just loop and loop forever, update state and then draw.
    while (true) {
        long nanoTimeAtStartOfUpdate = System.nanoTime();

        gameData.updateData();
        try {
            Graphics2D g = (Graphics2D) bufferStrategy
                    .getDrawGraphics();
            drawGame(g);
            g.dispose();
            if (!bufferStrategy.contentsLost()) {
                bufferStrategy.show();
            }
        }
        // This catch is to allow the application to not stop
        // working when the application encounters the possible bug:
        // http://bugs.sun.com/bugdatabase/view_bug.do?bug_id=6933331
        // One work around to not encounter this is to Disable d3d
        // using -Dsun.java2d.d3d=false
        // Not sure why the bug is said to "... has no consequences
        // other than a stack trace dump in a console (no hang ...",
        // as people are generally not going to catch an
        // IllegalStateException...
        // You can try to see if you can get the exception to print
        // by resizing the window rapidly on the primary or secondary,
        // or dragging the window off and on the primary monitor.
        // This of course assumes you are using d3d
        catch (IllegalStateException e) {
            e.printStackTrace();
        }

        waitUntilNextUpdate(nanoTimeAtStartOfUpdate);
    }
}
In the game loop, the loop calls the gameData.updateData() method. Here we update every object that depends on knowing how much time has elapsed.
/**
 * Updates any objects that need to know how much time has elapsed to
 * update any needed movements, animations, or events.
 */
 public synchronized void updateData() {
    // Calculating a new fps/ups value every second
    if (timeSinceLastFPSCalculation >= 1000000000) {
        fps = frames;
        ups = updates;
        timeSinceLastFPSCalculation = timeSinceLastFPSCalculation -
                1000000000;
        frames = 0;
        updates = 0;
    }

    long elapsedTime = System.nanoTime() - oldTime;
    oldTime = oldTime + elapsedTime;
    timeSinceLastFPSCalculation = timeSinceLastFPSCalculation +
            elapsedTime;

    // Loop through all circles, update them
    for (MovingCircle circle : circles) {
        circle.update(elapsedTime);
    }

    // An update occurred, increment.
    updates++;
}
The draw method is also called. You've seen some of the code in this method already.
private synchronized void drawGame(Graphics2D g) {
    // Obtaining the graphics of our drawing image we use,
    // most of the graphics drawn are drawn to this object
    Graphics2D drawingBoard = drawing.createGraphics();
    gameData.drawGameData(drawingBoard, drawing.getWidth(),
            drawing.getHeight());
    drawingBoard.dispose();

    final Graphics swingAndOtherGuiGraphics = g.create();
    synchronized (drawAreaBounds) {
        // The translate is needed to to align our drawing of
        // components to their "clickable" areas (changes where 0, 0
        // actually is, comment it out and see what happens!)
        swingAndOtherGuiGraphics.translate(drawAreaBounds.x,
                drawAreaBounds.y);

        Graphics gameGraphics = g.create();
        // Image call that scales and stretches the game's graphics over
        // the entire frame
        // NOTE: This method of stretching graphics is not optimal.
        // This causes a computation of a stretched image each time. A
        // better implementation would be to cache an image of the
        // latest representation of a drawn circle,
        // and re-cache whenever there is a visible change (like color,
        // or it's size, which would be due to a window resize), and
        // draw that cached image at the correct calculated location.
        // Additionally, it also causes the rendering to this image to
        // be done on the CPU. See the improvements section in the
        // tutorial.
        gameGraphics.drawImage(drawing, drawAreaBounds.x,
                drawAreaBounds.y, drawAreaBounds.width,
                drawAreaBounds.height, null);
        gameGraphics.dispose();
    }
    // componentToDraw is lazily set from the EDT during GUI creation
    if (componentToDraw != null) {
        // Paint our Swing components, to the graphics object of the
        // buffer, not the BufferedImage being used for the
        // application's sprites.
        // We do this, because Swing components don't resize on frame
        // resizes, they just reposition themselves, so we shouldn't
        // stretch their graphics at all.
        try {
            SwingUtilities.invokeAndWait(new Runnable() {
                @Override
                public void run() {
                    if (componentToDraw instanceof JComponent) {
                        ((JComponent) componentToDraw).paintComponents
                                (swingAndOtherGuiGraphics);
                    } else {
                        componentToDraw.paintAll
                                (swingAndOtherGuiGraphics);
                    }
                }
            });
        } catch (InterruptedException e) {
            Thread.currentThread().interrupt();
        } catch (InvocationTargetException e) {
            // should not happen
            e.printStackTrace();
        }
    }
    // In addition, draw the FPS/UPS post stretch, so we always can read
    // the info even if you shrink the frame really small.
    swingAndOtherGuiGraphics.setColor(Color.WHITE);
    // Grab the font height to make sure we don't draw the stats outside
    // the panel, or over each other.
    int fontHeight = g.getFontMetrics(g.getFont()).getHeight();
    swingAndOtherGuiGraphics.drawString("FPS: " + gameData.getFPS(),
            0, fontHeight);
    swingAndOtherGuiGraphics.drawString("UPS: " + gameData.getUPS(), 0,
            fontHeight * 2);
    swingAndOtherGuiGraphics.dispose();
}
That method in turn called gameData.drawGameData(), which is the following:
/**
 * Draws the GameData as needed
 */
 public synchronized void drawGameData(Graphics2D drawingBoard,
                                      int drawAreaWidth,
                                      int drawAreaHeight) {
    // This allows our text and graphics to be nice and smooth
    drawingBoard.setRenderingHint(
            RenderingHints.KEY_TEXT_ANTIALIASING,
            RenderingHints.VALUE_TEXT_ANTIALIAS_ON);
    drawingBoard.setRenderingHint(RenderingHints.KEY_ANTIALIASING,
            RenderingHints.VALUE_ANTIALIAS_ON);

    // Always draw over the image with a blank background, so we
    // don't see the last frame's drawings! (comment this out and
    // see what happens, it's fun pressing the change color button
    // rapidly too!)
    drawingBoard.setColor(Color.LIGHT_GRAY);
    drawingBoard.fillRect(0, 0, drawAreaWidth, drawAreaHeight);


    // Creating a graphics object to not clobber parameter drawingBoard
    // where MovingCircle's drawing method may change some state of
    // the drawingBoard parameter graphics object
    Graphics circleGraphics = drawingBoard.create();
    // Now draw all the circles, location 0,0 will be top left
    // corner within the borders of the window
    for (MovingCircle circle : circles) {
        circle.draw(circleGraphics);
    }
    circleGraphics.dispose();

    frames++;
}
Which calls circle.draw():
/**
 * Draw the circle
 */
 public synchronized void draw(Graphics g) {
    g.setColor(color);
    g.fillOval((int) x, (int) y, width, height);
}
Why I didn't use Canvas, and why you might want to
Why I didn't use Canvas
The main reason I didn't use a Canvas is that it's not a container. Since a Canvas is not a container, it means we cannot place Swing components on top of where we drew those graphics using just the Canvas itself. Using a layered pane with components on top of the Canvas would work, but in my experience the graphics from the buffer strategy would not draw underneath the would be transparent sections of components that called setOpaque(false).
Why you may want to use Canvas
If your application is okay with having Swing components drawn off to the side, then using a Canvas and skipping out on the hard work of integrating Swing on top of the application's actively rendered graphics, then using a Canvas would be a good decision. Another reason it may be better to use a Canvas is that you can add a Canvas to a JFrame, and to a JApplet. This allows you possibly have one class that has a Canvas, and two classes that can deploy your application as an Applet or Frame. I prefer to use use Java Web Start myself instead of deploying an Applet.
Room for improvements
One major improvement to gain more FPS is to cache the graphics of the drawn circle to create a managed image. Caching graphics that are used often to an image (BufferedImage created by createCompatibleImage) to draw again later lets you skip the time it takes to compute certain data about what you are drawing (such as the arcs of the circles drawn in this code), and also enables the image to be hardware accelerated after you draw it a few times. A BufferedImage created this way that isn't changed and drawn a few times will be cached to VRAM, creating what is known as a managed image. A managed image is a lot faster to render to the screen because it's transferring pixel data from VRAM to VRAM, leaving out the CPU, the bus, and main memory. This also allows the GPU to handle the task of drawing the image, freeing up the CPU to handle other tasks. For everytime the circle we draw changes, if we cached those graphics to such an image, and drew that image instead of manually constructing it every time with the Java 2D paint calls, we would see a great boost in rendering time. Also another good time to cache graphics is when the rendering actions we do cannot be handled directly by the underlying native graphics API such as antialiasing, so caching graphics that use those techniques is a great thing to do. Check out section 3.2.2. of Troubleshooting Guide for Java SE6 Desktop Technologies for a list of actions that will be bound to the CPU.
One other improvement, already mentioned but expanded here is to get rid of the idea of stretching graphics. The method of stretching graphics used in this tutorial is not that efficient, regardless of how many cached images are drawn to the image we stretch, there's still a lot of computation involved in stretching the image (which we do every render!). A better implementation would be to cache the stretched resized circle, and then draw the cached resized images at the correct calculated location to obtain the same effect. This eliminates the stretching of graphics at every render, to only one time when we cache the individual needed graphics. One other major improvement that this brings us, is that we will start to draw the graphics object passed by Swing, which is an improvement because Swing uses VolatileImage under the hood, where our Java 2D calls to methods such as drawRect are passed off to the underlying native API such as OpenGL or Direct3d.
Summary, advantages and disadvantages
Main advantages: Fastest way to render your program, allows for a consistent FPS for constant smooth animations.
Main disadvantages: Have to wait for the EDT to render Swing's graphics which incurs a small wait cost. Not being able to use a Canvas perfectly with components on top of it hinders the ability to deploy an application with those characteristics as an applet. For an approach of bringing your graphics to Swing instead of the other way around, check out my passive rendering guide, Double Buffering and Passive Rendering in Java using the a Timer Object, passive rendering can achieve similar FPS results, with arguably less of a headache.
Program example
Here's a program example I wrote that uses all the techniques I mentioned above.